
Unlock the secrets of cultivating your own hops at home with this comprehensive step-by-step guide. Discover the joys of growing fresh, aromatic hops for brewing delicious craft beers or adding a unique flavor to culinary creations. From selecting the right varieties to harvesting and processing, this article covers everything you need to know for a successful home hops garden.
Are you a craft beer enthusiast or a passionate home brewer? Have you ever thought about growing your own hops? Cultivating hops at home can be an incredibly rewarding experience, allowing you to explore unique flavors and aromas while adding a personal touch to your favorite brews or culinary dishes. In this guide, we’ll walk you through the process of growing hops, from choosing the right varieties to harvesting and processing your homegrown hops.
Here’s the short information chart for Hops:
| Attribute | Information |
|---|---|
| Botanical Name | Humulus lupulus |
| Common Name | Hops |
| Plant Type | Herbaceous perennial vine |
| Zones | USDA Zones 3-8 |
| Sun Exposure | Full sun to partial shade |
| Soil Type | Well-drained, loamy soil |
| Watering | Regular water, especially during |
| dry spells | |
| Growth Habit | Climbing vine |
| Height/Spread | Up to 20 feet tall, 6-12 feet wide |
| Special Features | Cones used in brewing beer |
Selecting the Right Hop Varieties
Before you begin your hops-growing journey, it’s essential to choose the right varieties. Hops come in various types, each with its own distinct characteristics and flavors. Some popular varieties for home growing include:
Cascade
Known for its citrusy and floral notes, Cascade hops are versatile and commonly used in American-style pale ales and IPAs.
Centennial
Offering a blend of citrus and pine aromas, Centennial hops impart a well-balanced bitterness and are often used in IPAs and pale ales.
Willamette
With its mild, earthy and slightly spicy flavor profile, Willamette hops are a great choice for English-style ales and lagers.
Consider your personal preferences, the beer styles you enjoy and the growing conditions in your area when selecting hop varieties.
Preparing the Growing Area
Hops are climbing vines that require a sturdy support system. Before planting, set up a trellis or poles for the hops to climb on. Ensure the support structure is tall enough, typically around 18 to 20 feet, and can withstand the weight of the mature vines.
Hops thrive in well-draining soil with a pH range of 6.0 to 7.0. Amend the soil with compost or well-rotted manure to improve drainage and nutrient content. Choose a location that receives at least 6 hours of direct sunlight per day.
Planting and Caring for Hops
You can start with hop rhizomes (underground stems) or hop plants. Plant the rhizomes or plants in early spring, around 2-3 feet apart, and cover them with 1-2 inches of soil. Water the newly planted hops regularly to encourage root establishment.
Hops require consistent moisture, especially during the growing season. Water the plants deeply once or twice a week, depending on the weather conditions and soil type. Mulching around the plants can help retain moisture and suppress weeds.
Fertilize the hops with a balanced fertilizer or compost tea every 4-6 weeks during the growing season to ensure proper growth and cone development.
Training and Supporting the Vines
As the hops start to grow, train the vines to climb up the trellis or poles. Gently guide the vines in a clockwise direction and use soft plant ties or twine to secure them to the support structure. Regularly check and retrain any wayward vines to ensure proper growth and cone development.
Pruning and Maintaining the Plants
Pruning is an essential part of hop cultivation. In early spring, before new growth emerges, prune the vines back to the ground, leaving only a few inches above the soil surface. This encourages vigorous new growth and better cone production.
Throughout the growing season, remove any diseased or damaged foliage and prune back any side shoots or suckers that emerge from the base of the plant. This helps direct the plant’s energy towards the main vines and cone development.
Pest and Disease Management
Hops can be susceptible to various pests and diseases, such as aphids, spider mites, downy mildew and powdery mildew. Regularly inspect your plants and take prompt action if you notice any issues.
Implement integrated pest management practices, such as introducing beneficial insects, using organic pesticides or fungicides (if necessary) and maintaining proper plant spacing and air circulation to discourage pests and diseases.
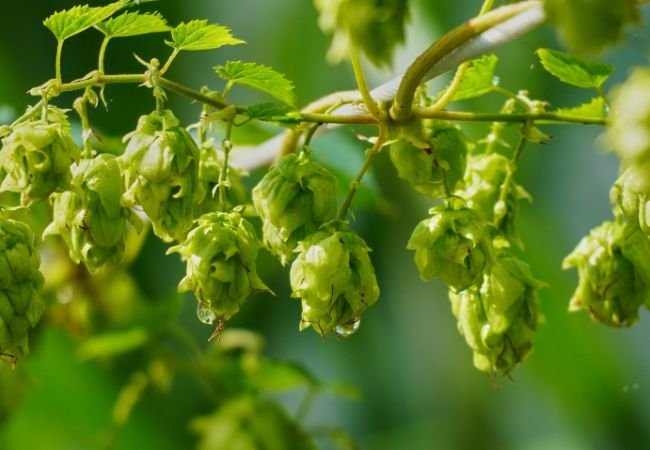
Harvesting and Processing Hops
Hops are typically ready for harvest when the cones feel papery and dry and the lupulin glands (yellow powdery substance) are visible. This usually occurs in late summer or early fall, depending on your location and variety.
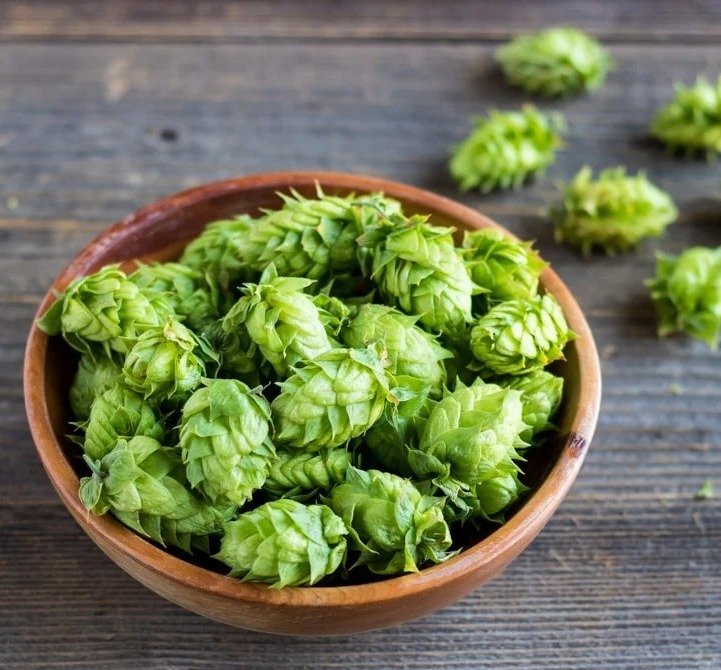
To harvest, carefully cut the vines near the base and gently remove the cones from the vines. Spread the cones out on a clean, well-ventilated surface and allow them to dry completely. Once dry, you can store the hops in airtight containers or bags in a cool, dark place for later use.
If you plan to use your homegrown hops for brewing, consider vacuum-sealing or freezing them to preserve their freshness and aroma.
Growing your own hops at home can be a rewarding and enjoyable experience. By following these steps, you can cultivate fresh, aromatic hops and explore unique flavors in your homebrews or culinary creations. With patience, attention to detail and a passion for hops, you’ll be well on your way to creating your own “Hops Heaven” right in your backyard.


Leave a Reply