Learn how to easily grow chives, the flavorful herb that adds a mild onion taste to your dishes. This guide covers everything from planting to harvesting and maintaining chives in your garden or container.
Chives are a wonderful herb to have in your kitchen garden. Their mild onion flavor enhances all sorts of dishes, from omelets and baked potatoes to soups and salads. Not only do they taste great, but chives are also super easy to grow. With their clump-forming nature and pretty purple flowers, they make an attractive addition to your garden beds or containers too.If you’re looking to start growing your own fresh chives, this guide will walk you through all the steps, from planting to harvesting and maintaining these flavorful herbs. Let’s get started!
Here’s a short chart with information about Chives (Allium schoenoprasum):
| Aspect | Information |
|---|---|
| Botanical Name | Allium schoenoprasum |
| Common Names | Chives |
| Plant Type | Herbaceous perennial |
| Zones | 3-9 |
| Exposure | Full sun to partial shade |
| Bloom Time | Late spring to early summer |
| Height/Spread | 12-24 inches tall, 6-12 inches wide |
About Chives
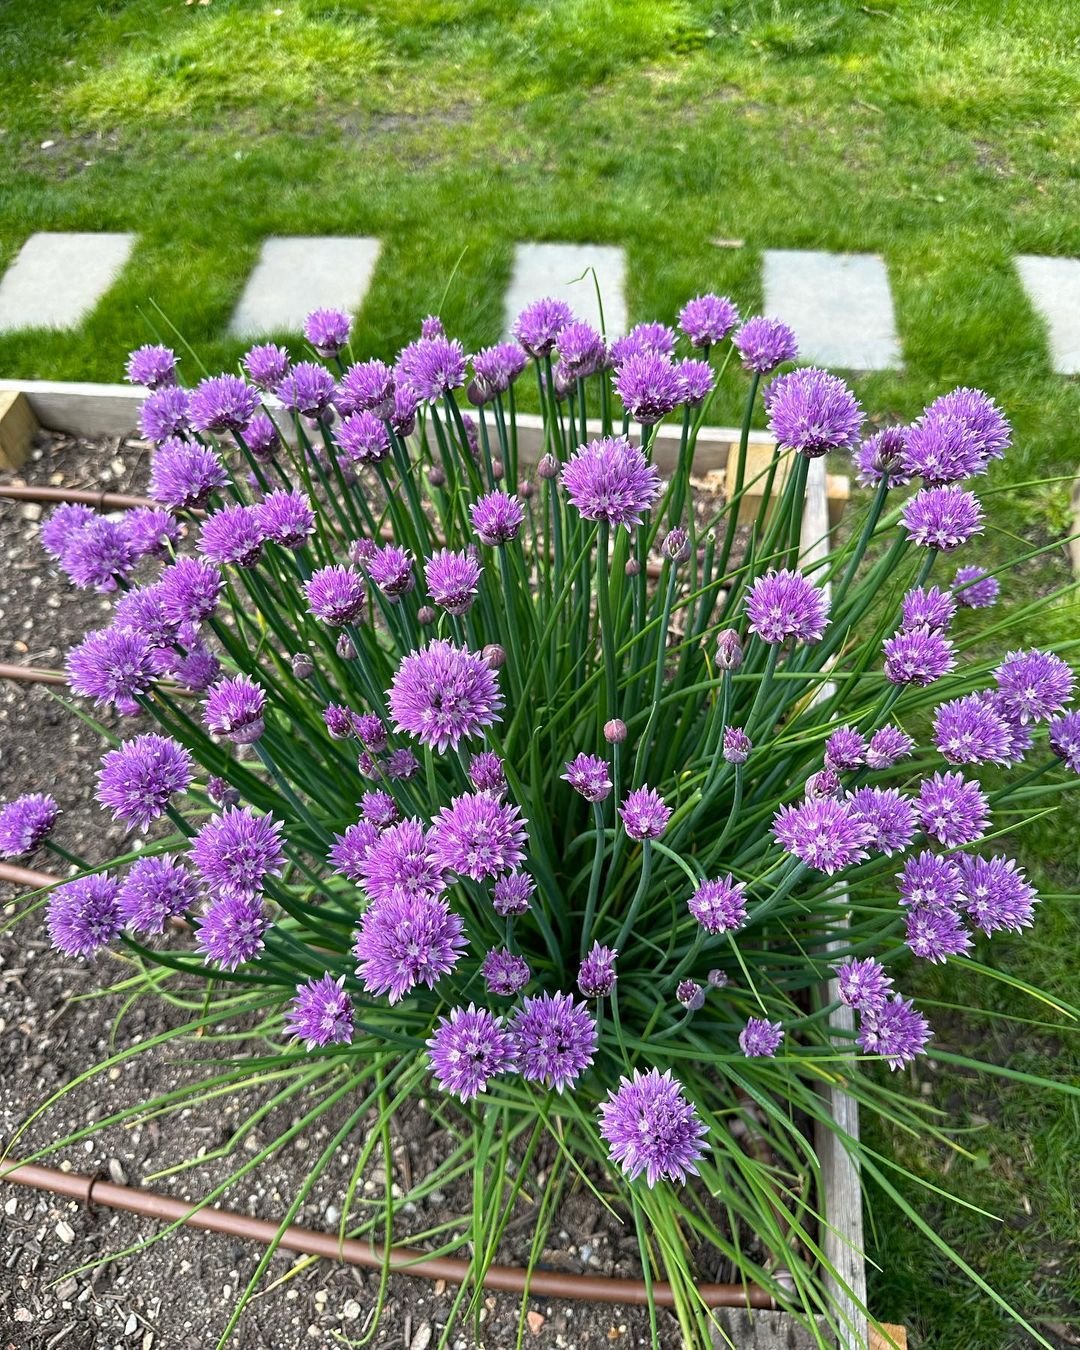
Part of the allium family along with onions, garlic, and leeks, chives (Allium schoenoprasum) are perennial plants. This means they’ll come back year after year once established. The thin, hollow green leaves have a mild onion taste, while the purple pom-pom flowers are also edible with a slightly more intense flavor.
Chives grow in small grasslike clumps that can reach 6-20 inches tall. They spread by seed and underground bulbs, gradually expanding their clumps over time.
There are a few different chive varieties you can grow:
Common chives –
The most widely grown variety with tubular green leaves and purple globe-shaped flowers.
Garlic chives –
Has flat, wider leaves with a more pronounced garlic flavor. White star-shaped flowers.
Chinese leeks –
Larger, flat leaves similar to green onions with white flowers.
When to Plant Chives
Chives can be planted in early spring as soon as the ground can be worked, usually 4-6 weeks before your last expected frost date. You can also plant them in late summer/early fall about 6-8 weeks before your first expected frost.
Spring plantings will allow the chives to get established before warm summer weather arrives. Fall plantings give chives time to develop healthy root systems over winter for an early spring harvest.
Where to Grow Chives
Chives do best in full sun to partial shade. They need at least 6 hours of direct sunlight per day for maximum growth and flavor development. Too much shade can cause chives to become spindly and stretched out. Well-draining soil is essential for healthy chive growth.
Amend heavy clay soils with compost or other organic matter to improve drainage. These hardy herbs can be grown in the ground or in raised beds and containers. Just be sure pots are at least 6-8 inches deep and have good drainage holes.
How to Plant Chives
Chives are usually grown from transplants or divided plant clumps rather than seeds. This gives them a head start and faster harvest time. For transplants or divisions, plant chives 4-8 inches apart in rows 12-18 inches apart. Space clumps 8-12 inches apart in all directions. When planting, bury the bottom of the transplants or divisions just deep enough so the top quarter is still exposed. Water thoroughly after planting.
Chive Seed Planting
If growing from seed, sow chive seeds 1/4 to 1/2 inch deep and about 1 inch apart in rows 12 inches apart. Gently cover with soil and water in. Chive seeds need soil temperatures around 60°F to germinate readily, so they may take 2-3 weeks to sprout in cooler spring soil. Once emerge, thin them out to 6 inch spacing.
Caring for Chives
Chives have very low maintenance requirements once established, needing only occasional watering and feeding.
Water
The most important care need is providing consistent moisture. Aim for about 1 inch of water weekly from rain or irrigation if it doesn’t rain. Avoid overwatering which can lead to rot or fungal diseases.
Fertilizing
Chives are light feeders. Side-dress plants with a balanced fertilizer or compost in early spring before new growth appears. One application should suffice for the season unless your soil is incredibly poor. Too much nitrogen results in lots of leafy growth rather than flavorful chives.
Mulching
Applying a 2-3 inch layer of mulch like bark chips or straw around chive plants helps retain moisture and suppress weeds. Pull mulch a few inches away from stems to allow airflow.
Dividing
Divide overcrowded or woody chive clumps every 3-4 years in early spring or fall. Simply lift up the whole clump and split it into sections using a shovel or garden fork, then replant the divisions.
Pests & Diseases
Chives have few pest or disease issues when grown in proper conditions. Potential problems include:
Aphids –
Use insecticidal soap or neem oil to control these sap-sucking pests.
Thrips –
Hose off foliage to remove these tiny insects.
Leaf miners –
Remove affected leaves. Spray leaves with neem oil as a deterrent.
Downy mildew –
Ensure good air circulation and avoid overhead watering to prevent this fungal disease.
Rust –
Remove and destroy affected leaves and plants in severe cases.
Harvesting Chives
You can begin harvesting chive leaves about 30 days after transplanting or 60-90 days if growing from seed. Try to avoid cutting more than a third of the plant at one time. To harvest, use clean scissors or pruners to cut leaves about an inch above the soil line. Or simply grab the outside leaves in a bunch and give them a gentle pull and twist to remove them.
For the longest harvest, continually remove leaves from the outside edges of the clump, allowing the center to keep producing new growth.Chive flowers are also edible and have a more intense onion flavor. Simply snip off the purple globe flowers as they appear to eat raw or cooked. After the chive foliage dies back in winter, you can dig up and divide plants in spring before new growth emerges.
That covers the essentials for successfully growing your own fresh chives! With their easy maintenance and productive harvests, chives are a garden staple every kitchen herb garden should have. Let me know if you have any other questions!




Leave a Reply