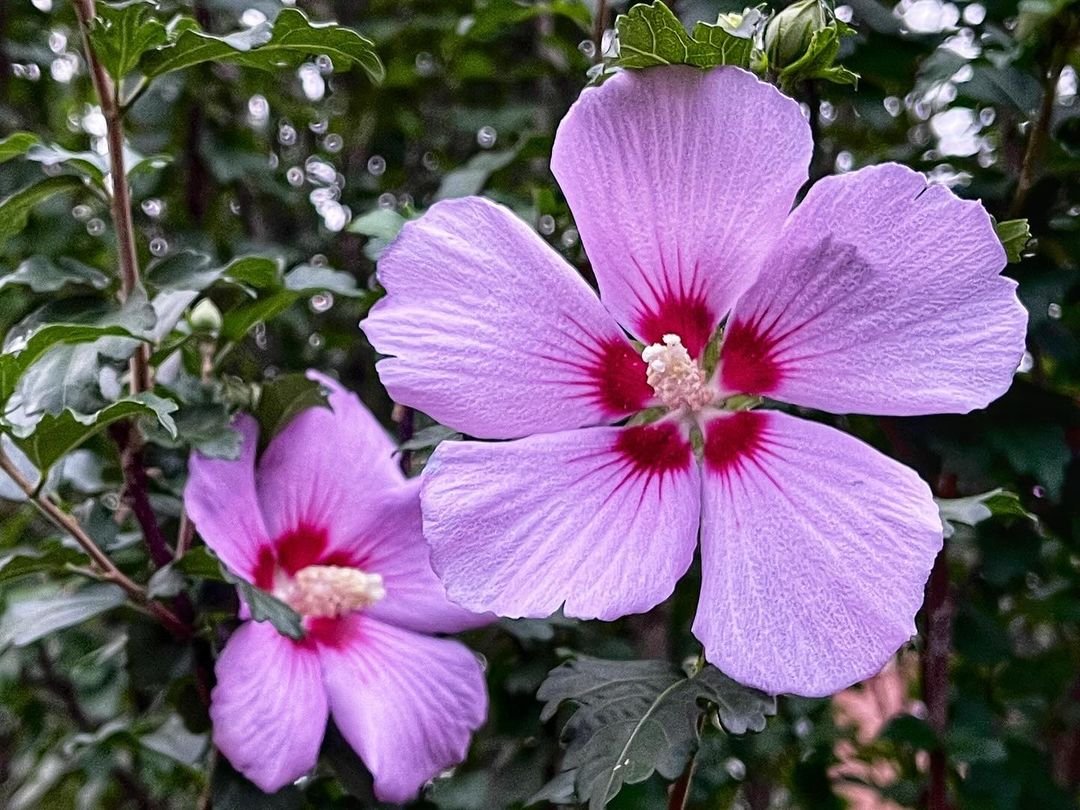
Follow these 7 easy tips from plant experts to grow vigorous, floriferous rose of Sharon shrubs. Learn the secrets to getting maximum blooms, preventing issues and keeping these old-fashioned beauties thriving for years.
Rose of Sharon (Hibiscus syriacus) is an old-fashioned flowering shrub that’s been gracing American gardens for centuries. With their tropical hibiscus-like blooms and easy care, it’s no wonder these plants have remained popular for so long. But even rose of Sharon can struggle if its basic needs aren’t met.
Here’s an easy chart for Rose of Sharon (Hibiscus syriacus):
| Aspect | Information |
|---|---|
| Botanical Name | Hibiscus syriacus |
| Common Name | Rose of Sharon |
| Plant Type | Deciduous shrub |
| Zones | 5-9 |
| Sun Exposure | Full sun to partial shade |
| Soil Type | Well-drained, moderately fertile |
| Bloom Time | Summer to fall |
| Flower Color | White, pink, red, purple, blue |
| Height/Spread | 8-12 feet tall, 4-10 feet wide |
| Special Features | Attracts pollinators, drought-tolerant |
Follow these 7 pro tips to keep your rose of Sharon shrubs blooming heavily and maintaining a healthy, vigorous habit year after year.
1. Choose the Right Variety

These woody hibiscus shrubs come in a wide range of flower colors including white, pink, purple, red, blue and even bi-colored varieties. You’ll also find single and double-flowered forms.
Beyond bloom traits, pay attention to a cultivar’s expected mature size when shopping. Rose of Sharon shrubs range from petite 4-footers all the way up to small tree-like 12-foot specimens. Be sure to pick one suited to the growing space.
Cold-hardiness can also vary, with some varieties being more cold-tolerant down to USDA zone 5 while others are best reserved for zone 7 and warmer regions.
2. Plant in Full Sun
Like their tropical hibiscus cousins, rose of Sharon absolutely need full sun exposure to bloom their best. Plants stuck in shady conditions will flower sparsely if at all.
Try to site rose of Sharon shrubs in a spot that receives at least 6-8 hours of direct sunlight daily, more if possible. The hotter the sun exposure, the more flowers you’ll get. Morning sun is especially beneficial.
This sun-loving plant handles heat and drought extremely well once established. Just be sure to keep them well-watered the first season after planting to assist with root establishment.
3. Amend Soil Properly
Rose of Sharon shrubs thrive in fertile, nutrient-rich, well-draining soil. Before planting, work several inches of compost, aged manure or other organic matter down into the soil across the planting area.
This amending will help loosen dense clay or compacted soils, improve drainage, and increase nutrient levels – all key factors for optimal growth and flowering.
Rose of Sharon can struggle in overly alkaline soil, so it’s also wise to have your soil pH tested beforehand. If needed, apply soil sulfur or aluminum sulfate to create the slightly acidic conditions they prefer.\
4. Space Plants Out
These shrubs can ultimately reach fairly large sizes at maturity, with some upright forms topping out at 8-12 feet tall and wide. Dwarf varieties tend to max out around 4-6 feet.
When planting, provide adequate room for each rose of Sharon to reach its expected size without heavy pruning later on. Space individual plants out by at least 6-8 feet, or up to 10-12 feet for the largest cultivars.
Crowding them too closely together or trying to squeeze in too many results in leggy, sparse growth and disappointing blooms. Provide sufficient growing room right from the start.
5. Prune for Best Form
Pruning rose of Sharon shrubs serves two main purposes – shaping the overall plant and encouraging more flowering.
In late winter or earliest spring before bud break, remove any dead, damaged or rubbing branches from the interior. You can head back the outermost branches as well if shaping is needed.
For maximum flower production, rose of Sharon blooms most prolifically on new growth each season. An additional pruning after the shrubs finish blooming in summer can be done by cutting back some of the older flowering wood.
Just take care not to remove too much of the green growth, as those new stems are where next year’s blooms will form.
6. Water and Feed Regularly
While fairly drought-tolerant once mature, rose of Sharon needs consistent moisture and nutrients throughout the growing season to fuel all that flowering.
Keep the soil evenly moist, watering deeply once or twice weekly as needed, especially in hot summer weather. Mulching annually with 2-3 inches of bark mulch will help conserve moisture too.
In early spring before bud break, top-dress around the shrubs with compost, aged manure or a granular rose fertilizer to provide nutrition. Follow up with a balanced liquid feed like fish emulsion or seaweed extract every 4-6 weeks.
This consistent moisture and fertilizing schedule will prevent issues like stunted growth, shedding leaves and buds, and poor flowering.
7. Control Potential Pests
Japanese beetles are one of the most common pests on rose of Sharon. They devour the plant’s leaves and flowers given a chance. Knock them off by hand or use neem oil or another organic pesticide.
Rose of Sharon plants can also occasionally fall victim to sap-sucking pests like aphids or scale insects. Products containing insecticidal soap often help eliminate these pesky bugs.
Be sure to disinfect pruners when removing diseased wood to avoid spreading any bacterial or fungal diseases. Proper spacing and avoiding overhead watering reduces disease risks too.
With a little attention paid to rose of Sharon’s specific needs, this old-fashioned beauty will reward you with an abundance of tropical-looking blooms all summer long. It’s no wonder these durable, low-maintenance shrubs have been garden standbys for generations!


Leave a Reply