
Learn why orchid leaves turn yellow and how to fix it. Discover common causes, prevention tips and solutions to keep your orchids healthy and vibrant.
Orchids are prized for their stunning blooms and lush green foliage. But what does it mean when those vibrant leaves start turning yellow? If you’re facing this issue, don’t worry – you’re not alone. In this comprehensive guide, we’ll explore the common causes of yellowing orchid leaves and provide practical solutions to help your orchids regain their health and beauty.
Here’s an updated detailed chart for Orchids:
| Category | Details |
|---|---|
| Botanical Name | Orchidaceae (family) |
| Common Name | Orchids |
| Plant Zone | 3-11 (varies by species) |
| Sun Exposure | Bright, indirect light |
| Soil Type | Special orchid mix or bark-based medium |
| Watering | Moderate; water when the medium is almost dry |
| Growth Habit | Epiphytic or terrestrial |
| Height/Spread | 6 inches to 4 feet tall / 6-24 inches wide (varies by species) |
| Special Features | Exotic and diverse blooms, long-lasting flowers, variety of colors and shapes, suitable for indoor growing |
Understanding Orchid Leaf Yellowing
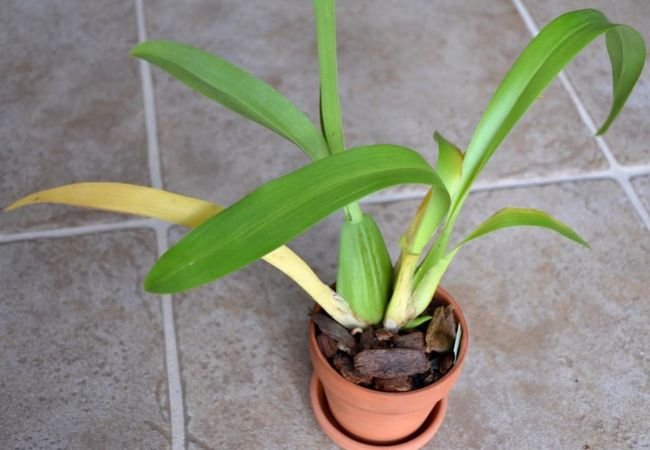
Before we dive into the causes and solutions, it’s important to understand that some yellowing is normal. As orchids grow, older leaves naturally yellow and fall off to make way for new growth. However, if you’re seeing excessive or premature yellowing, it’s time to investigate further.
Common Causes of Yellowing Orchid Leaves
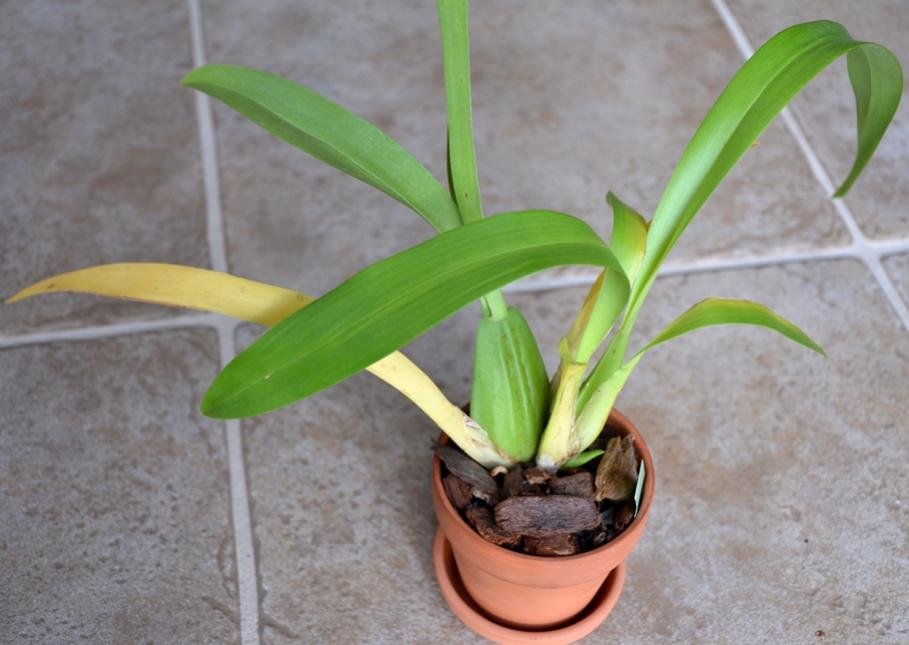
1. Overwatering
One of the most common causes of yellowing orchid leaves is overwatering.
Signs:
- Yellowing starts from the bottom leaves
- Leaves feel soft and mushy
- Roots may appear brown and rotted
Solution:
- Reduce watering frequency
- Ensure proper drainage in the pot
- Allow the potting medium to dry out between waterings
Prevention Tip: Always check the potting medium before watering. If it feels damp, wait another day or two.
2. Underwatering
Conversely, not providing enough water can also cause yellowing.
Signs:
- Leaves appear wrinkled or leathery
- Yellowing accompanied by leaf drop
- Aerial roots may appear shriveled
Solution:
- Increase watering frequency
- Soak the orchid in room temperature water for 10-15 minutes once a week
Prevention Tip: Create a watering schedule based on your orchid’s specific needs and environmental conditions.
3. Improper Light Exposure
Orchids are sensitive to light conditions, and both too much and too little light can cause yellowing.
Signs of Too Much Light:
- Leaves turn yellow-green or have red tinges
- Sunburned patches on leaves
Signs of Too Little Light:
- Darker green leaves
- Slow growth or lack of blooming
Solution:
- Adjust light exposure gradually
- For too much light, move the orchid away from direct sunlight
- For too little light, move closer to a light source or consider supplemental grow lights
Prevention Tip: Research the light requirements for your specific orchid species and adjust accordingly.
4. Nutrient Deficiencies
Lack of essential nutrients can lead to yellowing leaves.
Signs:
- Yellowing between leaf veins (interveinal chlorosis)
- Stunted growth
Solution:
- Feed your orchid with a balanced, orchid-specific fertilizer
- Follow the “weekly, weakly” rule: fertilize weekly at 1/4 to 1/2 strength
Prevention Tip: Use a high-quality orchid potting mix that provides essential nutrients.
5. Temperature Stress
Orchids are sensitive to temperature fluctuations.
Signs:
- Sudden yellowing after a temperature change
- Bud blast (flower buds dropping before opening)
Solution:
- Move the orchid to a location with more stable temperatures
- Avoid placing orchids near drafts or heating/cooling vents
Prevention Tip: Use a thermometer to monitor the temperature around your orchid and maintain it within the ideal range for your specific species.
6. Pest Infestations
Pests like spider mites, scale insects, or mealybugs can cause yellowing.
Signs:
- Tiny spots or stippling on leaves
- Visible insects or webbing
Solution:
- Isolate the affected plant
- Treat with neem oil or insecticidal soap
- For severe infestations, consider systemic insecticides
Prevention Tip: Regularly inspect your orchids for signs of pests and treat promptly if detected.
General Care Tips to Prevent Yellowing Leaves
- Proper Potting: Use a well-draining orchid potting mix and repot every 1-2 years.
- Humidity: Most orchids prefer humidity levels between 50-70%. Use a humidity tray or room humidifier if needed.
- Air Circulation: Ensure good air movement around your orchids to prevent fungal issues.
- Regular Cleaning: Gently wipe leaves with a damp cloth to remove dust and improve photosynthesis.
- Balanced Feeding: Use a balanced, orchid-specific fertilizer and flush the potting medium monthly to prevent salt buildup.
When to Seek Expert Help
If you’ve tried these solutions and your orchid’s condition isn’t improving, it might be time to consult an expert. Local orchid societies or experienced nurseries can provide personalized advice based on your specific orchid species and growing conditions.
Yellowing leaves on your orchid can be concerning, but with proper diagnosis and care, most issues can be resolved. Remember, orchids are resilient plants, and with patience and attention, you can nurse them back to health. By understanding the common causes of yellowing leaves and implementing the right solutions, you’ll be well on your way to maintaining healthy, vibrant orchids that will reward you with stunning blooms for years to come.
Learn more about general orchid care
Discover tips for growing healthy orchids
Happy orchid growing, and may your plants always be lush and green!


Leave a Reply